Database / Installation Guide / Session I / Session III
In the last session we did some part of filtering the records, now we in this session we will do the rest of the filtering.
The topics which will be covered in this session
- Filtering the dates.
- Using aliase.
- How to delete a row.
- How to update a row.
Step 1: Filtering the dates.
I am going to use the Item table that we created in the last session.

Let’s say i need to find all the details of the items which has arrived after 5th January 2018.
So this is a query related to date where we need to filter the records after the given date.
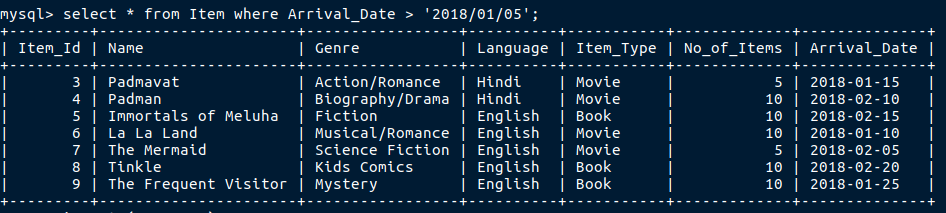
Here we have used ‘>’ sign to filter the records, in the same way we can use ‘<’ sign if we need records before a particular date.
Next if i want to find details of items which ranges between 15th January 2018 and 10th February 2018 we will use this.

‘Between’ is an inbuild mysql keyword to find records in a range.
It gives us an accurate answer.
The above query can also be solved in this way

Step 2: Using aliase and creating temporary table.
Aliase is just a name given to a column. you will understand it better in next few lines.
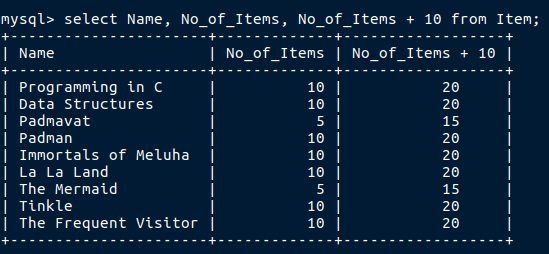
Now i need to perform some mathematical operation on an existing table and find the result, so how will i do that.
Note: This is not stored in the database it’s temporary.
But when i do that i will get the right output but as you can see the column name is not looking good, so how to make it look good!
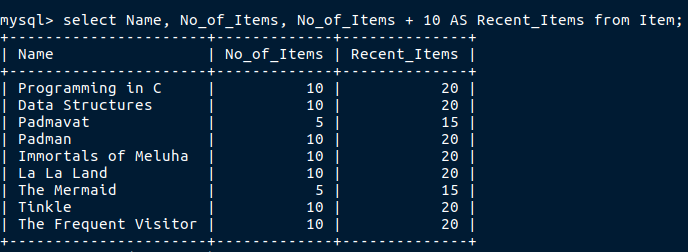
By using aliase.I will show you.
Now see the column name seems meaningfull isn’t it?.
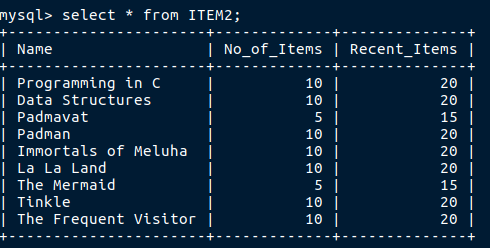
After doing this say you realise it would be better if i could just store this in the database, even that can be done by doing this
After running this query your temporary data will be stored in the table ITEM2.

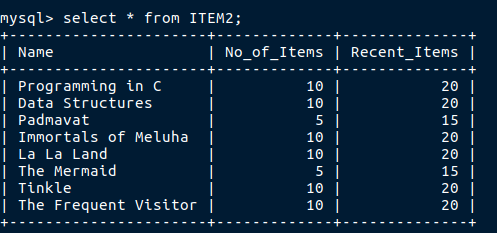
To check whether it has really worked you could always run the select * query.
Step 3: Delete records from the table.
To perform delete operation there is nothing tough just write Delete instead of Select query.
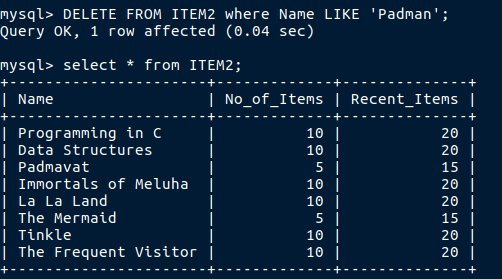
This delete records rowwise.
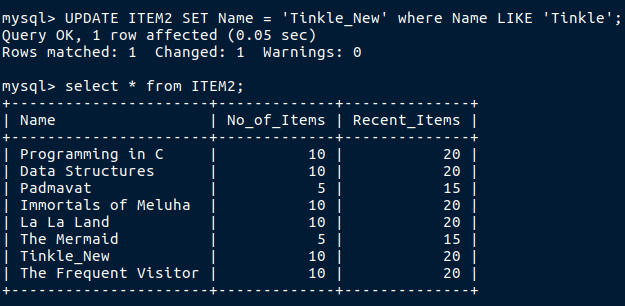
Step 4: Update data in a table
We use update if we want to change the records in the table.
Now observe that ITEM2 has a record Tinkle in its name field.
Now i want to change it to Tinkle_New
After performing update
This concludes our Session II.
Hope you all understood this small part of database, now lets move on to Session III